Guts and Bolts Tips and Tricks
Here are some helpful tips and tricks for using the Guts and Bolts game with your class:
-
The first few levels are fun to watch students work through trial and error. Let students have those moments of “What if I do this, that didn’t work, how about this?” Be prepared for the other students to chime in with inquiry.
-
If projecting the game for the class, have a pair of students working together and rotate pairs with each level or attempt. This takes the pressure off of an individual.
-
Read the Clipboard clues aloud. What might they mean? If students are stuck, refer back to the clue. At the end of each level, discuss the relation of the clue to the level solution.
-
As levels progress, you may need to have students look at what is different (or added) on the next level. Discuss possibilities, then allow time for exploration.
-
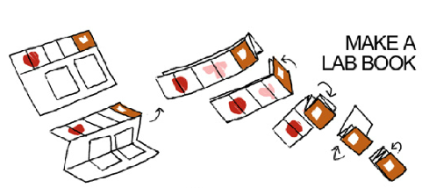
Print out the double-sided Moby’s Notebook for jotting student notes and diagrams of what works (and what doesn’t). Use the notebook as a checkpoint after students complete certain levels.
-
Students do not have to complete all levels in one sitting. If need be, they can return to the level they left off and complete the game without redoing the previous steps. Level 12: “Life” can only be unlocked after successfully completing Level 11.
-
If the connected organs and pipes start getting overwhelming, you can drag the entire thing to adjust the view to make it easier to analyze connections.
-
Have them show you their completed pages in the notebooks before moving on to the next level.
- Don’t forget about the game features around the perimeter of the game space. Often students overlook the organ tray on the right. It might also be helpful to discuss what the in/out portals represent (blood flowing to the lungs, etc.). This might help in later levels.


